
お料理は味はもちろん、見た目、彩りも大切。目指すは見て美味しい、食べて満足なメニュー!
大好きなレモンを使い、はちみつと合わせてドレッシングをゼリーにしました。
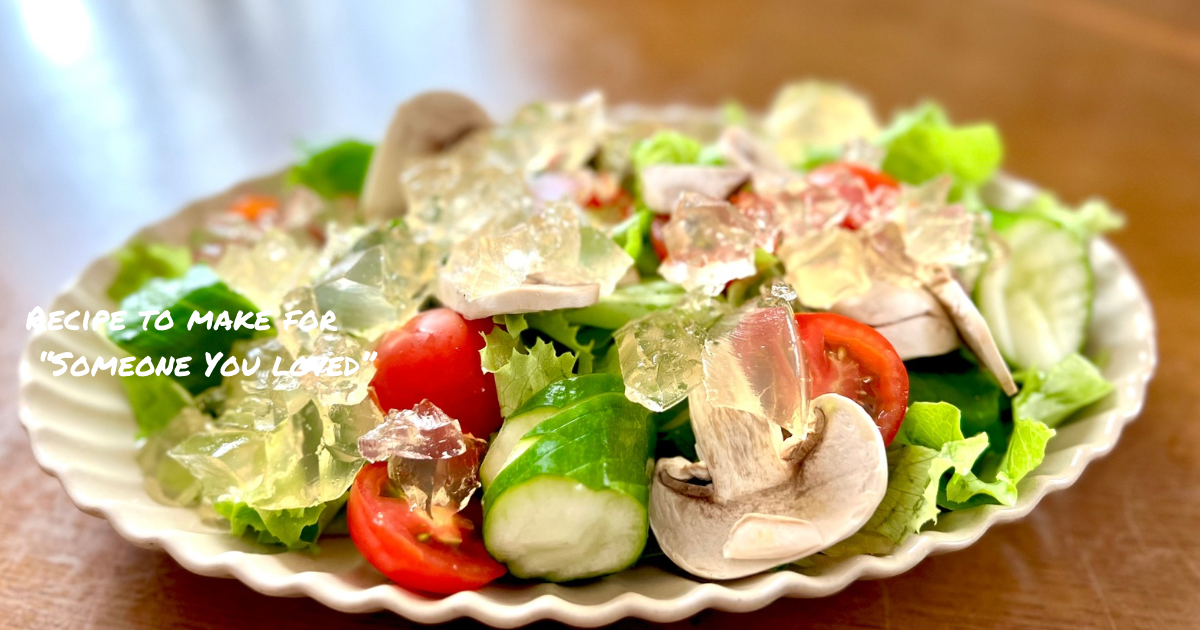
前菜をキラキラさせると華やかになります。普段の食事やホームパーティーまで使えるとっても簡単で爽やかなレシピをぜひお試しください。
⚠️はちみつを使っているため、1歳未満の赤ちゃんにはおすすめしません。
小さなお子さんには「はちみつ」の代替品として砂糖シロップや**オリゴ糖シロップ(乳児可のもの)**で甘みをつけることをおすすめします。レモン汁の分量も少し減らしてください。

【材料】3-4人分
レモン汁…大さじ2(約30ml)
ポッカサッポロ ポッカレモン100使用
はちみつ…大さじ1.5(お好みの甘さで)
砂糖シロップやオリゴ糖シロップ可
水…70ml
塩…ひとつまみ
粉ゼラチン…5g
森永製菓 クックゼラチン使用。
戻さないで使えるタイプ
【作り方】
1. 液体を温める
小鍋にレモン汁、はちみつ、水、塩を入れ、中火で温めてはちみつを溶かす(沸騰させない)
2. ゼラチンを溶かす
火を止め、粉ゼラチンを加えて混ぜ、完全に溶かす。
3. 保存容器に流し冷やす
粗熱を取り、保存容器に移して冷蔵庫で1時間以上冷やし固める。
5. 仕上げ
固まったゼリーをフォークで崩し、サラダにトッピングする。
ポイント
ゼラチンゼリーの溶け始める温度はおよそ25℃〜30℃前後(参考: 森永クックゼラチン公式 https://www.morinaga.co.jp/cook_guide/gelatin/)夏場の30℃を超えるような室温では、 ゼリーが柔らかくなったり、形を保てなくなったり、部分的に溶けることがあるので今回ゼラチンの量は少し多めにしてます。 ふやかすタイプのゼラチンを使うときはパッケージに書いてある手順で最初にふやかしておきましょう。
生搾りのレモンを使うとより風味が良くなります。レモンを使うときは皮も少し削って加えてみて。
|
|
![[商品価格に関しましては、リンクが作成された時点と現時点で情報が変更されている場合がございます。]](https://hbb.afl.rakuten.co.jp/hgb/4a2614e5.3765df96.4a2614e6.fbb281a5/?me_id=1421663&item_id=10023077&pc=https%3A%2F%2Fthumbnail.image.rakuten.co.jp%2F%400_mall%2Frakutensokuhaimart%2Fcabinet%2Frakuten24%2F019%2F4902888544019.jpg%3F_ex%3D240x240&s=240x240&t=picttext "[商品価格に関しましては、リンクが作成された時点と現時点で情報が変更されている場合がございます。]")

盛り付けイメージ見て! キラキラしてて爽やかでしょ?
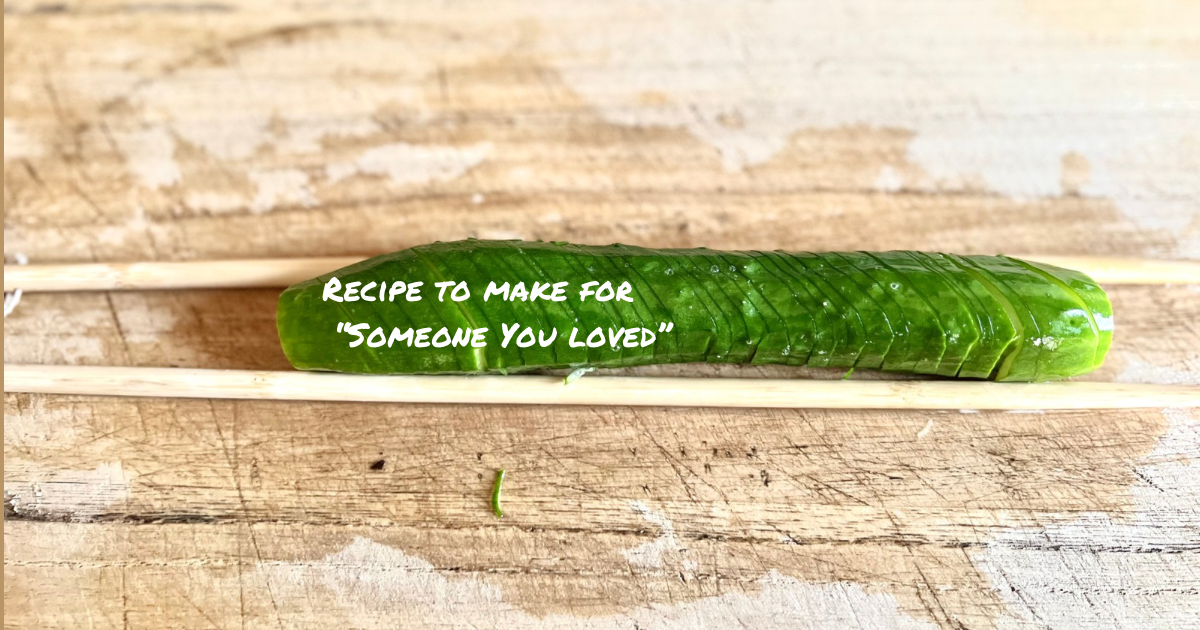
野菜の切り方もちょっと工夫する。きゅうりをいつもとちがう切り方に。
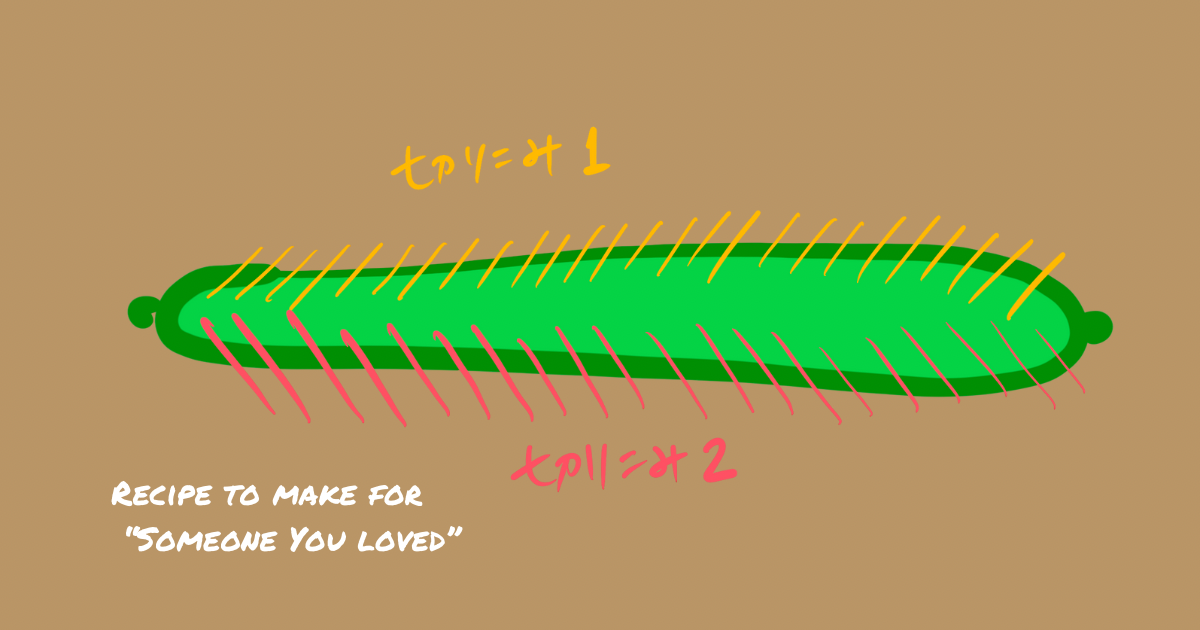
菜箸できゅうりを挟んで包丁で切り込むと貫通せずに切り込みがいれられる。一方向切れたらきゅうりを裏返して同じように切り込みを入れる
こんなイメージね
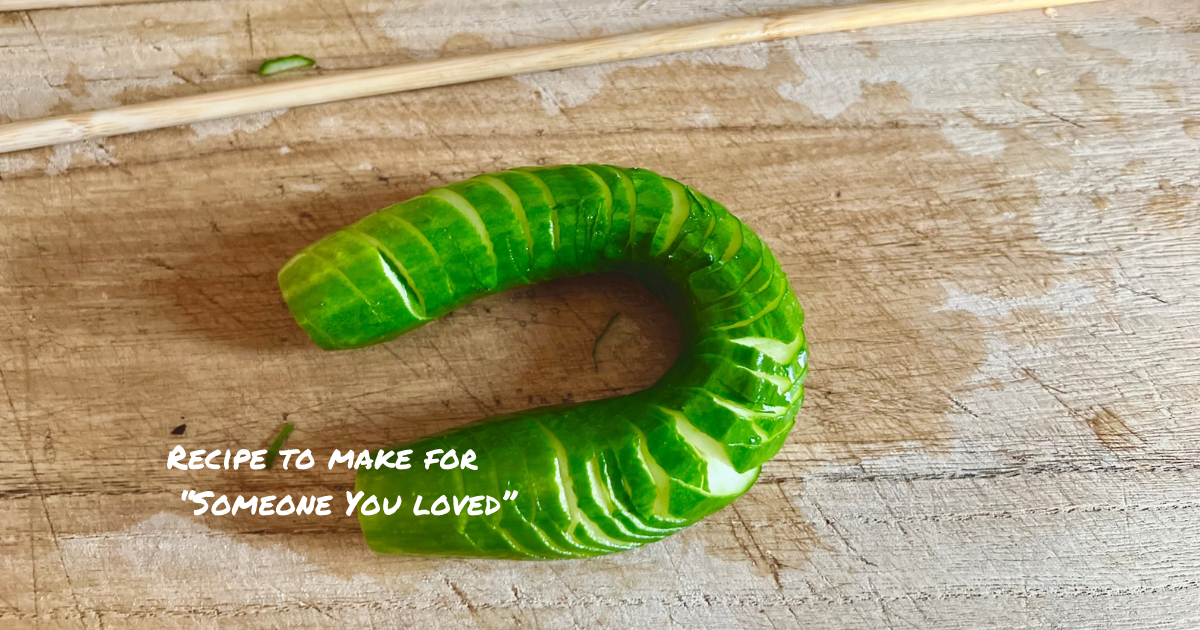
すると!きゅうりがくにゃくにゃに曲がる。ヘビみたい。
食べやすいサイズにカットしてお皿に盛り付けましょう
サラダにドレッシングに加えて、オリーブオイルもかけるとより風味が良くなりますよ。
|
|
![[商品価格に関しましては、リンクが作成された時点と現時点で情報が変更されている場合がございます。]](https://hbb.afl.rakuten.co.jp/hgb/434c2450.7fdc44f6.434c2451.c450a468/?me_id=1261122&item_id=10061339&pc=https%3A%2F%2Fthumbnail.image.rakuten.co.jp%2F%400_mall%2Frakuten24%2Fcabinet%2F541%2F4902471045541.jpg%3F_ex%3D240x240&s=240x240&t=picttext "[商品価格に関しましては、リンクが作成された時点と現時点で情報が変更されている場合がございます。]")
Translation
Cooking isn’t just about taste – presentation and color are just as important. My goal is always to create dishes that look delicious and leave you feeling fully satisfied after eating them!
This time, I used my favorite lemon and combined it with honey to make a dressing jelly. Adding this sparkly jelly to your appetizer instantly makes your table feel more festive. It’s such a simple, refreshing recipe that works perfectly for everyday meals or when hosting friends at home. Give it a try!
⚠️ Because this recipe uses honey, it’s not suitable for babies under one year old.
If you’re making it for small children, I recommend swapping the honey for sugar syrup or infant-safe oligosaccharide syrup as a sweetener. Also, reduce the amount of lemon juice slightly for a milder taste.
I wanted to start my morning feeling motivated, so I prepped the jelly the night before and went to bed with a smile.
Lemon & Honey Dressing Jelly
Ingredients (Serves 3-4):
- Lemon juice … 2 tablespoons (approx. 30ml) I used store-bought lemon juice
- Honey … 1.5 tablespoons (adjust sweetness to your liking)
You can substitute with sugar syrup or oligosaccharide syrup - Water … 70ml
- A pinch of salt
- Powdered gelatin … 5g (the type that doesn’t need pre-soaking)
Instructions:
- Warm the liquid
In a small saucepan, add lemon juice, honey, water, and salt. Heat over medium until the honey dissolves, but don’t let it boil. - Dissolve the gelatin
Turn off the heat, add the powdered gelatin, and stir until completely dissolved. - Chill the jelly
Let it cool slightly, pour into a storage container, and refrigerate for at least an hour until set. - Finish and serve
Once set, use a fork to break up the jelly and sprinkle it over your salad as a topping.
Tips:
- Gelatin jelly starts to soften at around 25°C–30°C (77°F–86°F). In the summer, when room temperatures exceed 30°C, the jelly can become too soft or lose its shape. That’s why I’ve added a slightly larger amount of gelatin this time.
- If you’re using gelatin that requires blooming, follow the instructions on the package to soak it first.
- Freshly squeezed lemon juice will give it an even better flavor. You can also grate a little lemon zest for extra fragrance.
Look at this plating! Isn’t it beautiful and refreshing?
Little cutting hack for your cucumbers:
- Place chopsticks on either side of the cucumber and make cuts down to the chopsticks (they’ll stop your knife from cutting all the way through).
- Flip it over and do the same cuts on the other side.
This way, your cucumber turns into a wiggly, snake-like shape.
Cut into bite-sized pieces and arrange them on your plate – it makes your dish look extra fun and elegant.
Thank you for reading today!