揚げ物は美味しいですよね。 昔ダイエットで10kgくらい一気に落としたとき、油モノを本気で控えていたら便秘になってしまい人間には適度な油が必要なことを体感しました(失礼しました) それ以降、揚げ物も適度にいただいてます。
今回は下処理もご紹介。揚げたてはとっても美味しいのでぜひ作ってみてね。
さぁ、エビの下処理から始めよう。(今日は家族に手伝ってもらいました)

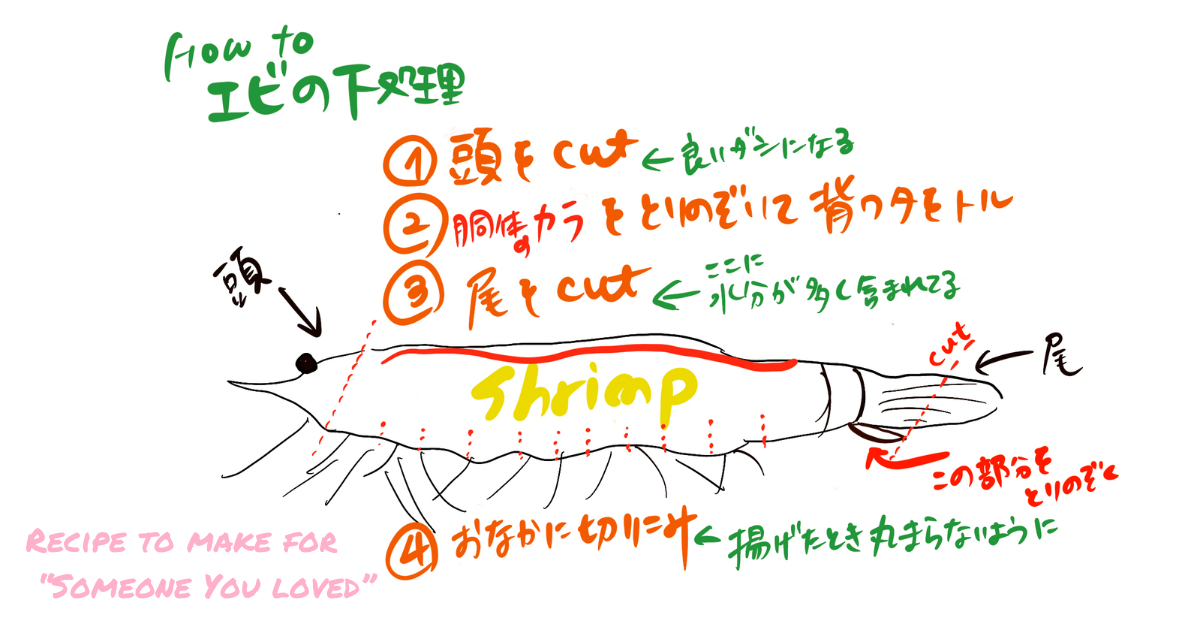
まずはエビを水で洗い、頭の部分をひねって取り除く。

次に胴体部分の殻をむき、背ワタを取り除く
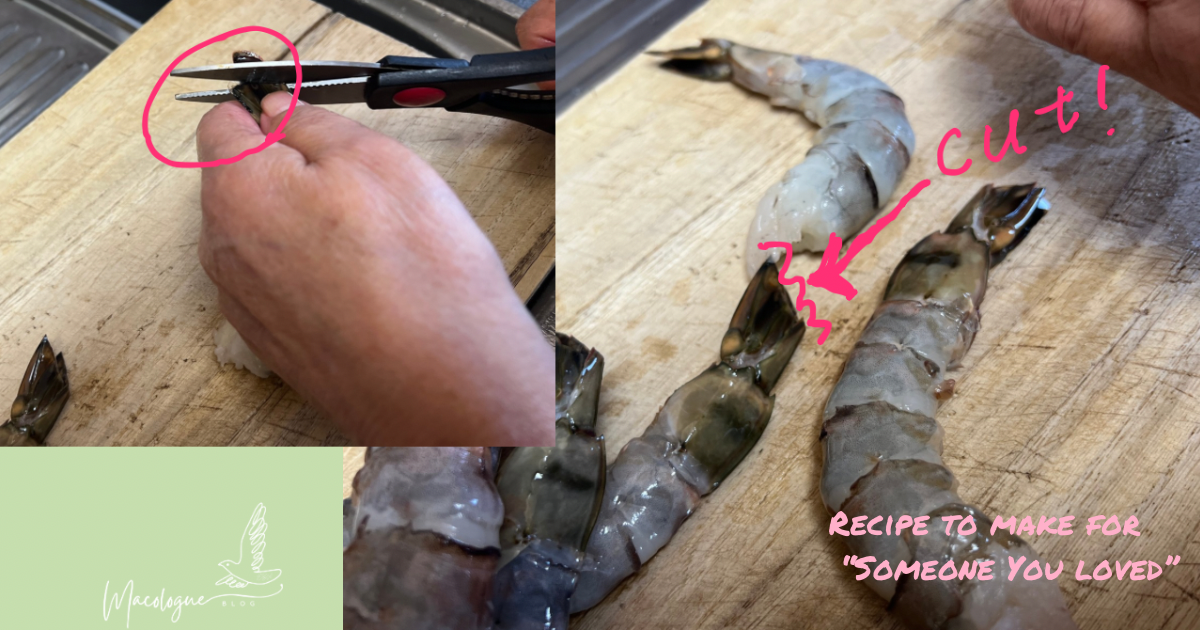
尻尾の部分は水分が多く含まれているのでこのままにしておくと揚げた時に油が跳ねて危ないです。ハサミでカットする。

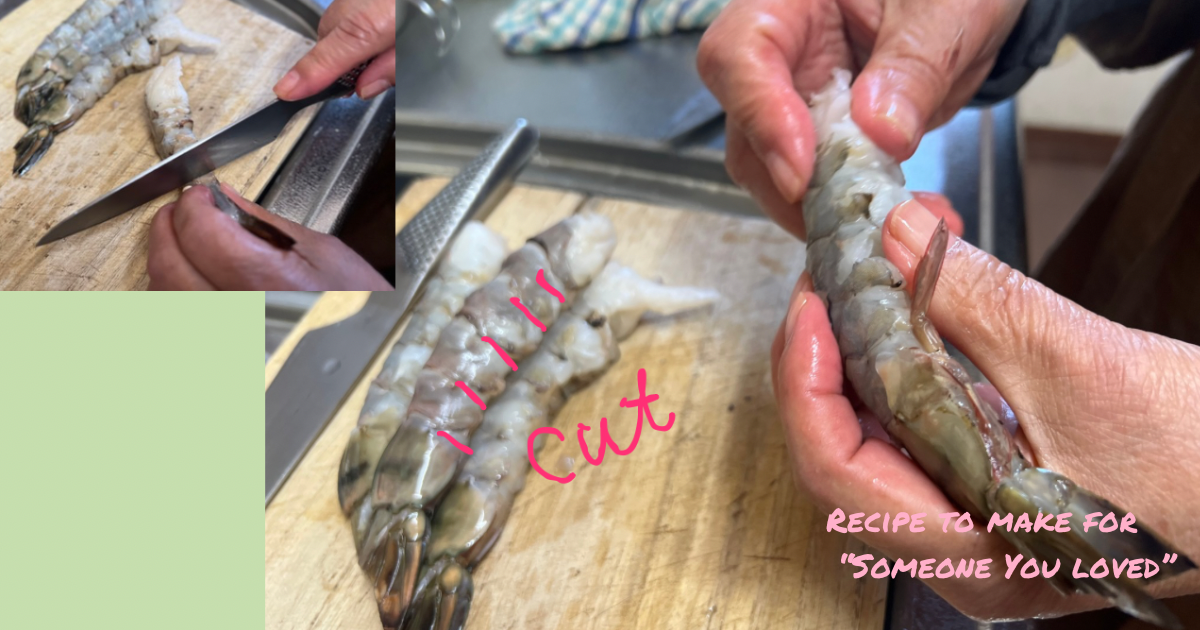
そのまま揚げるとエビが丸まってしまうので、お腹の部分に切り込みを入れておく。

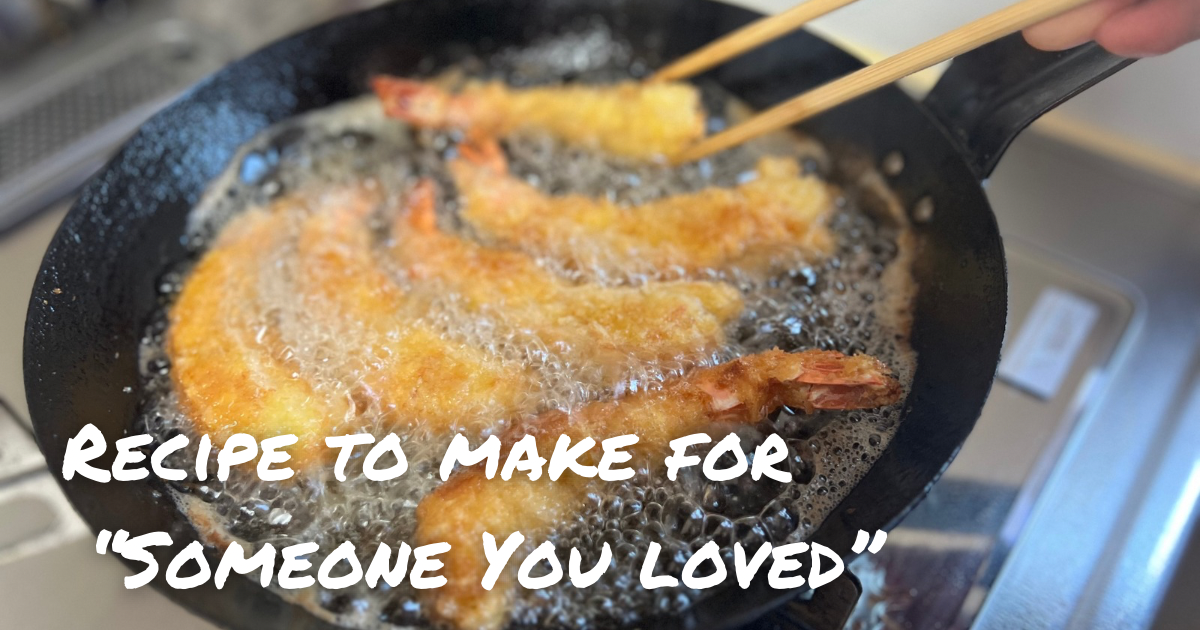
小麦粉→溶き卵→パン粉 の順にエビに衣をつけて、油で揚げる。
揚げたて最高❤︎
Translation
Fried Food Is Just So Good, Isn’t It?
I mean, who doesn’t love something crispy and golden?
Back when I went on a serious diet and dropped about 10kg in one go, I completely cut out fried foods and anything oily. The result? I ended up constipated. Yep—turns out our bodies actually need a bit of healthy fat to function properly.
Ever since then, I’ve learned to enjoy fried food in moderation. And when you make it at home, fresh out of the fryer? So good.
Today, I’m sharing not just how I make my fried shrimp, but also how I prep them. Trust me, it makes all the difference!
Let’s Start with Cleaning the Shrimp
1. First, rinse the shrimp under cold water.
2. Then, twist off the heads. (Don’t toss them! They make an amazing broth—I always freeze them and use them later for shrimp soup.)
Next, Peel and Prep
3. Remove the shell from the body, and devein the shrimp by pulling out the dark line along the back.
4. The tails hold a lot of moisture, which can cause hot oil to splatter, so snip off the tips with kitchen scissors.
A Little Trick to Keep Them Straight
5. Shrimp tend to curl up when fried, so make small slits along the belly to help them stay straight.
Time to Coat and Fry!
6. Dredge the shrimp in flour → dip in beaten egg → coat with breadcrumbs.
7. Fry until golden and crispy.
Freshly fried shrimp? Absolute heaven.
Give it a try—once you taste it, you’ll never go back to store-bought!