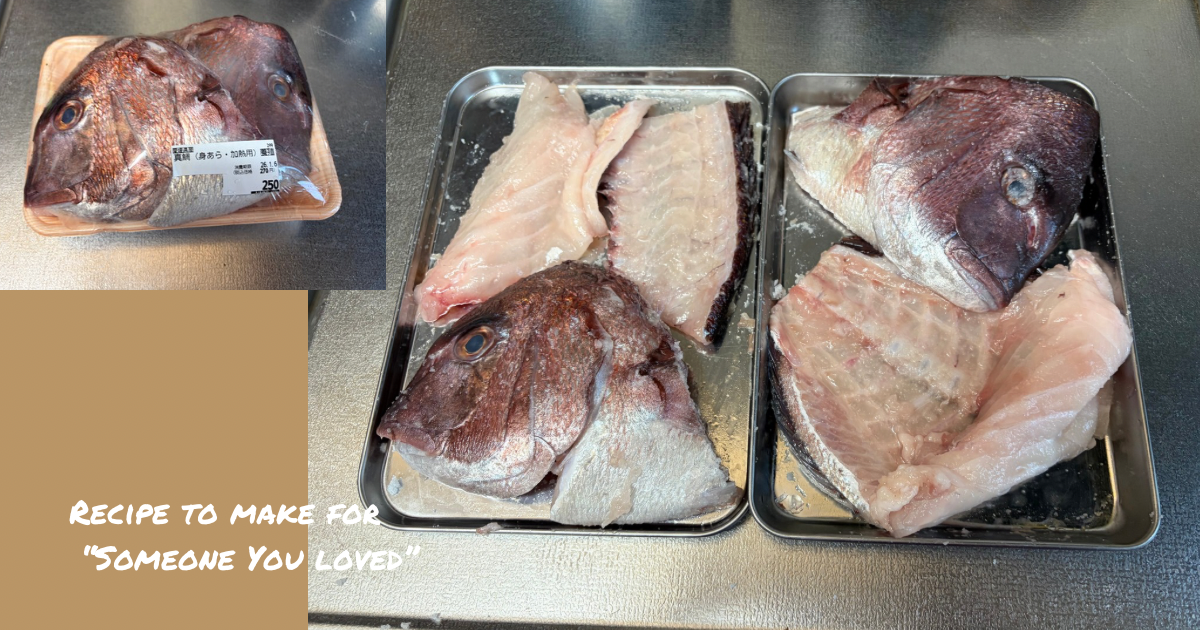
ここ数日、お肉ばかり食べていたので何か良いお魚あるかなと、普段通っているお魚屋さんをぶら散歩。
見つけたよ。鯛のあら。900gで250円。
これであら汁を作ったら出汁がめっちゃ出て美味しいだろうなと妄想しながら即買い。
さぁ作ろう!
材料 4-5人分
鯛のあら … 900g
水 … 1200〜1500ml(具材と出汁をしっかり出す量)
酒 … 大さじ3〜4
味噌 … 大さじ3〜4(お好みで調整)
大根 … 200〜300g(いちょう切り)
生姜 … 薄切り数枚(臭み取り用)
長ねぎ … 1本分(小口切り)
塩 … 下処理用にたっぷり(後で調整)
今回入れていませんが豆腐を入れると栄養的にもおすすめ。
作り方
あらの 下処理(臭み抜き)
鯛のあら全体に塩をまんべんなく振り、20-30分置く。ざるなどにあらを入れ、熱湯をかけてアクや汚れを落とす。表面が白くなるくらいでOK。その後、冷水で血合いやウロコを丁寧に洗い流す。 汚れを落とすことで出汁は澄んだ味になる


出汁をとる
鍋に水1200〜1500mlと下処理した鯛のあらを入れる。
酒・生姜を加えて火にかけ、弱〜中火でじっくり煮る
→ 沸騰直前まで温め、アクを丁寧に取ります。
出汁を弱火にする理由
旨味成分を丁寧に取り出す
雑味・苦みを出しにくくする
透明感のある味に仕上げる
アク取りがしやすい
あらの分量によって水の分量が違うけど、量の目安はあら全体が水に浸かっていればOK
具材を煮る
大根を加えてさらに10〜15分ほど煮る。
豆腐はここで加える。温まったら火を弱める。
味付け
火を弱めて味噌を溶き入れる。
→ 味噌は煮立てすぎないように注意してください。
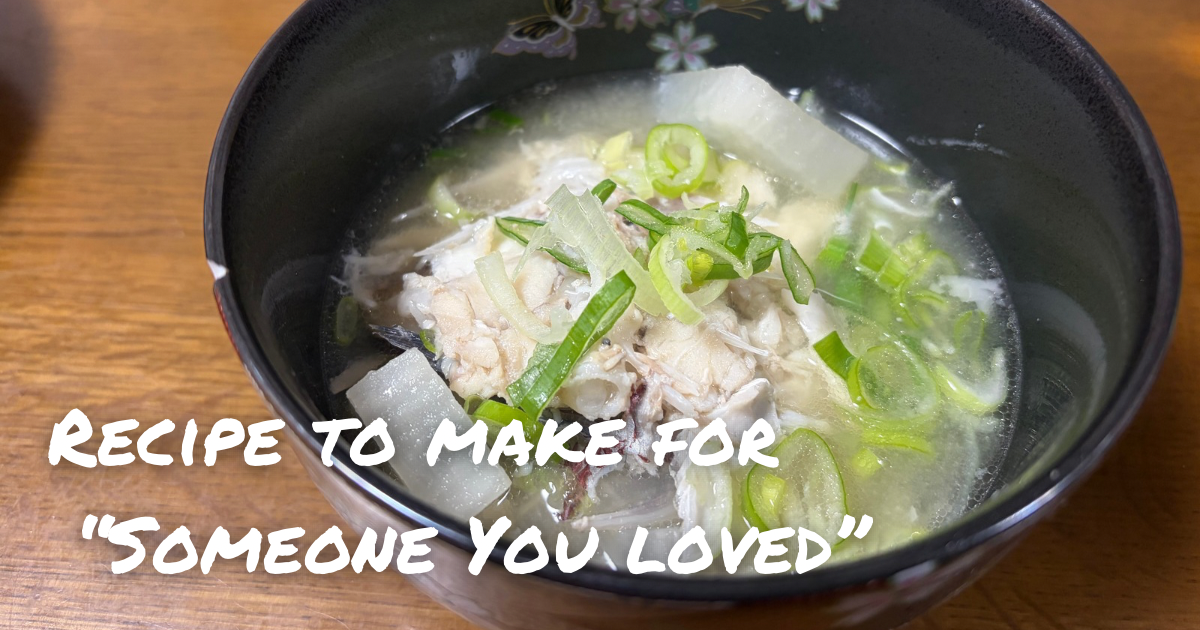
盛り付け
器によそって長ねぎを散らして、召し上がれ
Translation
For the past few days, I’d been eating way too much meat, so I found myself craving something lighter. I wandered over to my usual fish shop, just browsing, when I spotted it: tai ara (sea bream bones and head).
900g for 250 yen.
I immediately pictured a pot of rich, flavorful soup bubbling away—one of those dishes where the fish does all the work for you. Obviously, it came home with me.
Alright, let’s cook
Tai Ara Jiru (Sea Bream Soup) Serves 4–5
Ingredients
•Tai ara (sea bream head & bones) … 900g
•Water … 1200–1500ml (enough to fully cover the fish)
•Sake … 3–4 Tbsp
•Miso … 3–4 Tbsp (adjust to taste)
•Daikon radish … 200–300g (sliced into half-moons)
•Ginger … a few thin slices (for deodorizing)
•Long green onion … 1 stalk (finely chopped)
•Salt … plenty, for pre-treatment
I didn’t add it this time, but tofu is a great addition nutritionally and works beautifully in this soup.
How to Make It
Prep the fish (remove any fishy smell)
•Sprinkle salt generously over the tai ara and let it sit for 20–30 minutes.
•Place the fish in a colander and pour boiling water over it—just until the surface turns white.
•Rinse gently under cold water, removing blood, scales, and any impurities.
This step makes a huge difference. Proper cleaning gives you a clear, clean-tasting broth.
How much salt should you use?
A good rule of thumb is about 3% of the fish’s weight.
•900g × 0.03 ≈ 27g of salt
•That’s roughly 1½ to just under 2 tablespoons
If the fish smells strong, use a bit more. If you want to keep it lighter, use slightly less.
Make the broth
•Add the water and prepared tai ara to a pot.
•Add sake and ginger, then heat over low to medium heat.
•Warm it slowly until just before boiling, skimming off any foam or scum carefully.
Why keep the heat low?
•Draws out umami gently
•Prevents bitterness
•Keeps the soup clear and elegant
•Makes scum easier to remove
As long as the fish is fully submerged, your water amount is fine
Cook the vegetables
•Add the daikon and simmer for 10–15 minutes, until tender.
•If using tofu, add it here and gently warm through.
Season
•Lower the heat and dissolve the miso into the soup.
•Do not let it boil after adding miso—this keeps the aroma and flavor intact.
Serve
•Ladle into bowls and sprinkle with chopped green onion. Done!
Simple, comforting, and deeply nourishing—this is one of those dishes that reminds you how powerful good ingredients can be.