

とうもろこしを使ったスイーツが近頃流行っている。なんて情報を聞いたので、とうもろこしを使ったプリンを作りました!
材料 カップ4-5個分
とうもろこし 1本
オリーブオイル 小さじ1
牛乳…250ml
生クリーム…200ml
卵…2個
卵黄…2個
グラニュー糖…50g
塩…ひとつまみ
バニラエッセンス…2〜3滴(お好みで)
作り方
1. とうもろこしを焼く。


最初の6〜8分:ふたをして蒸し焼き
その後4〜5分:ふたを外し、転がしながら焼き色を付ける
プリン用なので、真っ黒に焦がすより、ところどころ濃い焼き色が付く程度に。焦げすぎると苦味がプリン全体に出るので注意!
魚焼きグリルなら、強めの中火で8〜12分。2〜3分おきに回すといいよ。
オーブントースターなら、1000W前後で12〜15分。途中で2〜3回転がす。
太くて火が通りにくい場合は、ラップをして電子レンジ600Wで2分ほど予熱してから焼くと、表面を焦がしすぎず甘みを引き出せます。
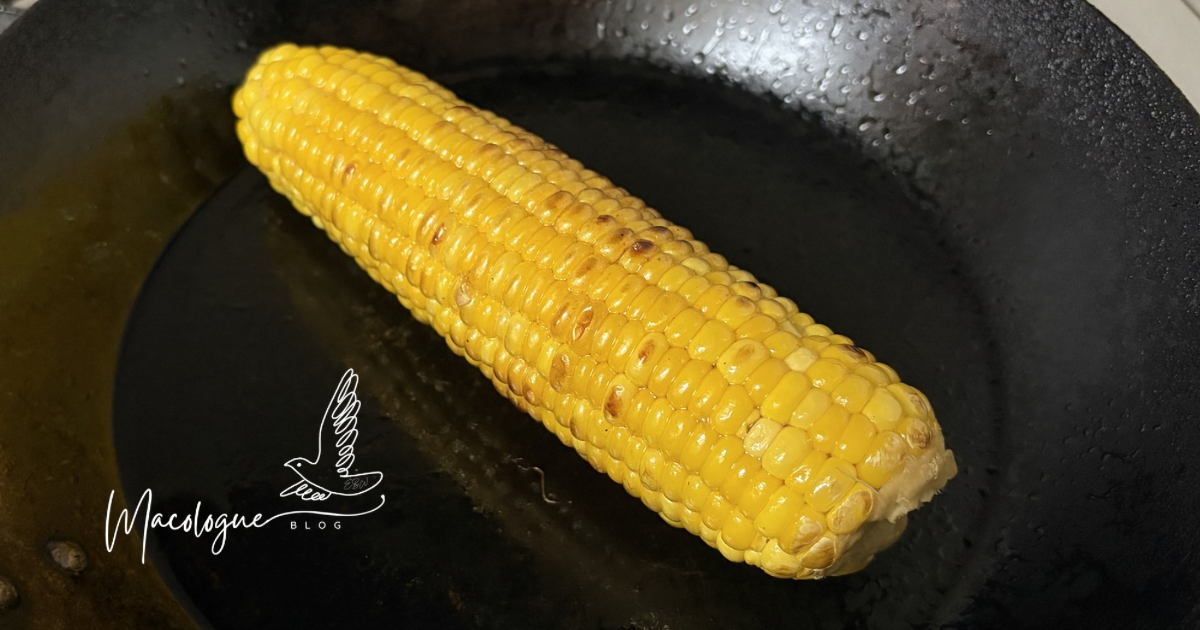
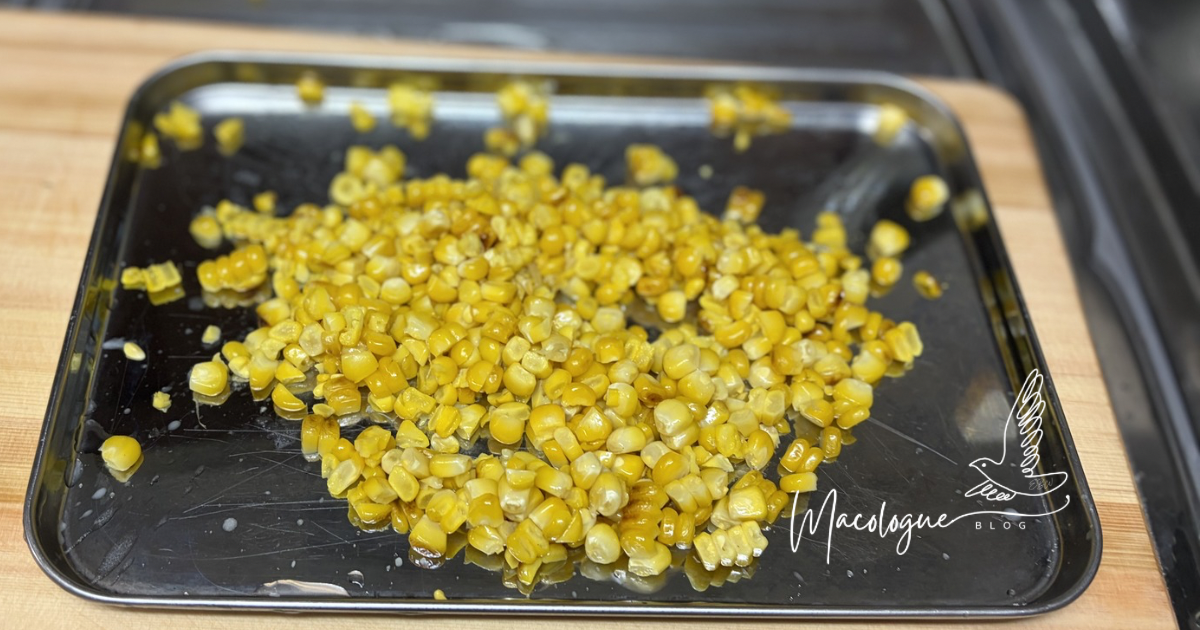
2. 粒を外す
包丁で粒を削ぎ落とします。飾り用に数粒取り分けておきましょう。
3. ペーストを作る
とうもろこしと牛乳をミキサーにかけます。ザルでこすと滑らかで食べやすくなるのでおすすめ。
4. 温める
鍋に とうもろこしペーストと、生クリームを入れて、60〜70℃まで温めます。沸騰させない。
5. 卵液を作る
卵・卵黄・グラニュー糖・塩を混ぜる。泡立てないよう静かに混ぜるのがポイント。
6. 合わせる
温めた液を少しずつ卵液に加えながら混ぜます。
最後にバニラエッセンス(お好みで)を加えます。
**今回は作らなかったですが、カラメルを作ってカップの底に流すと味わいが変わります
*カラメル
グラニュー糖…50g
水…大さじ1
熱湯…大さじ1
鍋にグラニュー糖と水を入れ、中火で加熱します。濃いきつね色になったら火を止め、熱湯を加えます(はねるので注意)。プリンカップの底に流し入れる。
7. 焼く
プリン液をこしながらカップに注ぎます。
(2回目の濾し作業)
150℃のオーブンで30〜35分湯せん焼き。
カップを置いた天板に熱湯を注ぐ。火傷に注意。天板をオーブンにセットしてから熱湯を注ぐと安定するかも。オーブンから出した時、プリンの中心が少し揺れる程度になればOKです。
8. 冷やす
冷蔵庫で4時間以上冷やして完成!
Translation
I recently heard that corn-based desserts are becoming a big trend, so I decided to make a creamy roasted corn pudding. The natural sweetness of fresh corn pairs surprisingly well with rich custard, and roasting the corn first gives it a delicious caramelized flavor.
Makes 4–5 servings
Ingredients
- 1 ear of fresh corn
- 1 tsp olive oil
For the pudding:
- 250 ml (1 cup) milk
- 200 ml (about ¾ cup + 1 tbsp) heavy cream
- 2 eggs
- 2 egg yolks
- 50 g (¼ cup) granulated sugar
- A pinch of salt
- 2–3 drops vanilla extract (optional)
Instructions
1. Roast the corn
Roasting brings out the corn’s natural sweetness and adds a lightly smoky flavor.
Using a cast-iron skillet (recommended):
- Remove the husk and lightly coat the corn with olive oil.
- Cover with a lid and cook over medium heat.
- Steam for 6–8 minutes with the lid on.
- Remove the lid and continue cooking for 4–5 minutes, turning occasionally until you get golden brown spots.
Since this is for pudding, you’re aiming for a nice golden char—not blackened corn. Too much charring can make the pudding taste bitter.
Using a grill (broiler):
- Grill over medium-high heat for 8–12 minutes, turning every 2–3 minutes.
Using a toaster oven:
- Bake at around 1000W for 12–15 minutes, turning the corn a couple of times.
Tip: If your corn is especially thick, microwave it (wrapped in plastic wrap) at 600W for about 2 minutes before roasting. This helps it cook evenly while preventing the outside from burning.
2. Remove the kernels
Cut the kernels off the cob with a sharp knife.
Save a few kernels for decorating the finished pudding.
3. Make the corn puree
Blend the corn kernels with the milk until smooth.
For an extra silky texture, strain the mixture through a fine-mesh sieve.
4. Warm the mixture
Pour the corn puree and heavy cream into a saucepan.
Heat gently to about 60–70°C (140–160°F).
Don’t let it boil.
5. Prepare the custard
In a bowl, gently whisk together:
- eggs
- egg yolks
- sugar
- salt
Try not to create too many bubbles.
6. Combine everything
Slowly pour the warm corn mixture into the egg mixture while stirring constantly.
Add the vanilla extract, if using.
Optional: Make caramel
I skipped the caramel this time, but adding it to the bottom of each cup gives the pudding a richer, more classic flavor.
Ingredients
- 50 g granulated sugar
- 1 tbsp water
- 1 tbsp boiling water
Heat the sugar and water in a small saucepan over medium heat.
Once it turns a deep amber color, remove it from the heat and carefully stir in the boiling water (it will splatter!).
Immediately pour the caramel into the bottom of each pudding cup.
7. Bake
Strain the custard one more time as you pour it into the pudding cups.
This second straining makes the pudding extra smooth.
Bake in a 150°C (300°F) oven for 30–35 minutes using a water bath.
Pour hot water into the baking tray after placing the cups inside the oven tray to avoid spills and burns.
The pudding is done when the edges are set but the center still has a slight wobble.
8. Chill
Refrigerate for at least 4 hours before serving.
Enjoy!
The pudding is creamy and silky with the gentle sweetness of fresh corn and a hint of roasted flavor. It’s a fun twist on traditional custard and the perfect dessert to enjoy during corn season!